Friday, January 3, 2014

Sketch Layout Challenge #3 - using the brayer

Our last challenge we did over a longer period of time with it being Christmas/New Year and the busyness that comes along. The challenge was issued early December and here it is.


Alicia was our challenge chooser this time round and she threw in the added challenge of using our Brayer somewhere in the project!! 

Brayer #102395 $21.95
Not everyone in our group owns a Brayer so those who didn't just did the layout challenge alone. It was a tricky one but I love what everyone came up with. 


Alicia had fun with the design and decided once she had her idea she would make several designs to use up some of her Sale-a-bration (SAB) DSP from last year. Here is how she used the Brayer in her design:
- run plain cardstock through Vine Street Embossing Folder (last years SAB)
- ink up Brayer with Versa Mark (#102283) clear ink and run over the raised surface of the embossed cardstock
- sprinkle with Clear Embossing Powder (#109130) & heat set with Heat Tool (#129056)

They look bright and cheery & fun! 


Next up is Kymberly's designs. She has just recently joined up as a Demonstrator (woohoo!) and doesn't have as big of a stash as she wishes and didn't have a Brayer so she had fun with the layout challenge and played around with some of her gorgeous DSP. I love both these designs. They're clean, matched well, and uncomplicated. Nice job Kymbo!


Next is Ingrid from Inky Ingrid. She was the first to complete the challenge back in December and came up with this gorgeous design. Here is how she made it: 
- cut a piece of gloss paper and "mask" your sun 
- ink up the Brayer with Marina Mist Ink (#126962) and roll it from the top down until you're happy with the blue colouring
- then ink up the Brayer with Sahara Sand Ink (#126976) and roll again but from the bottom up
- remove post it note and sponge using various yellow and orange inks to get the effect you desire for the sun. 
- stamp your image using Staz On Ink (#101406) and sponge edges also.


Rochelle from Lille Parti came up with two Christmas designs for this challenge. The first card she used her Brayer on the embossed strip of card stock to apply Versa Mark Ink (#102283) and then heat set Iridescent Ice Emboss Powder (#101930). It looks just like snowflakes! 

The second card is a little more simplistic and the Brayer was used to colour the a Tea Lace Paper Doily (#129399) with green ink! I love both designs! 


And this is my design! I decided to let my Facebook followers decide my colour combo just for fun! The first combo given to me was Tangerine Tango, Tempting Turquoise, Rich Razzleberry & Whisper White. Tricky combo if you ask me! But it didn't turn out too bad afterall. I will admit there were a fair few attempts that failed before this one though!! This is how I used my brayer:
- open up the Beautifully Baroque Embossing Folder (#130917)
- ink up my Brayer with Rich Razzleberry ink (#126950)
- roll the ink over the inside of the embossing folder
- put a piece of paper inside embossing folder, close it, and rub your hands across the folder with your hands evenly all over.

Can't wait for our next challenge! Let me know if you'd like to join in!


Go here & here to see previous challenges.


Christy

Wednesday, January 1, 2014

Tutorial: How to schedule posts on Facebook Pages

A lot of small businesses now use Facebook to set up a Page. It's a fantastic tool Facebook has provided to help people have an online, social media presence for free. One of the fantastic features of Facebook Pages is the schedule post's option. I am someone who likes to investigate new features as they appear and try to learn and understand how they work. At first I wasn't thrilled with scheduling, but my opinion has since changed now that I understand how it works better. Here is a basic run down of how it works so that you can try using it on your Facebook Page. 


First things first, you need to decide if you want to schedule a Status, or a Photo/Video. This process works the same regardless of what you select. In this instance I have chosen to just schedule a good morning status for tomorrow morning. So just type in your content and add your photo/video as you normally would. 

Just a little bit of information about content & reach. The algorithms of Facebook are always changing. Previously you would have excellent reach with status posts, and the reach on photo uploads, or if you were to share a link, was horrible. Without boring you with the details Facebook is beginning to change this around. You may have noticed already (I know I have) but photo's and links are achieving better organic reach. A tip that was given by a FB marketing guru was to post 2 photos instead of 1. I have been experimenting with this and have been pleased with the results thus far. Maybe you could give it a go too! 

Ok sorry, back to scheduling. So type in your text and add your photo or video as you normally would. BUT! Do not hit post. This is where you do something differently. 


Under your status bar in the left hand corner is a small blue clock. Click on that clock and it will open up your scheduling options. 


First, select the date you want to schedule your post for by clicking on the little red & white calendar icon which is next to today's date. You can schedule for later in the day, the next day, next week, next month or next year!! In this instance I selected for the next day. 


Next you need to click on "Add a Time" to the right of the date selector. Just start typing in the time you have in mind and it will pop up with some options for you. You can select from the options, or if you wish you can type them all in yourself. 

Then hit SCHEDULE. 


Once you have successfully scheduled your post, this window will popup on your screen. It recaps the scheduling information for you to do a post scheduling check up to make sure you've selected the correct time & date. If you need to adjust the time or date, just click on "View Activity Log" and your post will be there. There is a drop down menu in the same box as the post and you can select to edit or delete the scheduled post. 

You can see in the bottom left corner "Schedule another post". Go ahead and click there if you have several posts you are ready to schedule ahead of time.


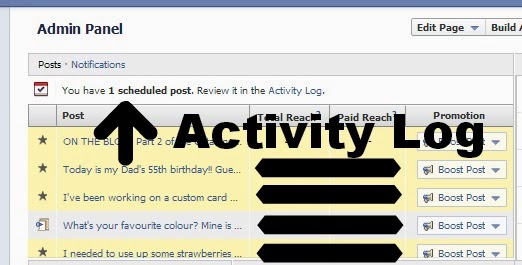
After you have finished scheduling, if you would like to look back over your posts, or you need to edit them after exiting out of the popup message pictured above, you can access them through your Admin Panel. It is right at the top so you will be able to find it easily. Just go into Activity Log and all your scheduled posts will be there. 

NOTE: You can schedule posts from Android & Apple devices also. You just need to download the Facebook Pages Manager App and you are good to go. Once you type in your status and added in your photo, once again just click on the little clock icon, and select the date & time you wish to post. 

I hope this has been helpful! Just for fun, come join in on the crafty fun on my Facebook page. 

Christy

Tuesday, December 31, 2013

Valentine's Day goodies!


I love Valentine's Day. It's a perfect opportunity not only to tell our dearest ones "I love you", but to show love and care and thought towards the people in our lives that we love and care and think about! Luckily Stampin' Up! have provided us this year with some fabulous fun & love inspired products called "A Whole Lot of Love"! 

The products are available through to 27 January (or while supplies last). They are exclusive and they will not be available after the promotion. The great part is there are no purchase limits! You can buy as many items as you like! And here they are....

Love You More Stamp Set
Clear: $29.95
Wood: $37.95

Flowerfull Heart Stamp
Wood: $16.95

Follow My Heart Stamp Set
Clear: $21.95
Wood: $27.95

Sweet Sayings Cards & Envelopes
12 printed card bases, 12 envelopes (4 each of Real Red, Pool Party & Crisp Cantaloupe)
$9.95
#134609

Sweetheart Treat Bags
12 heart sacks, 12 die cut labels, 12 pre-cut pieces of Pool Party Baker's Twine
$8.95
#134610

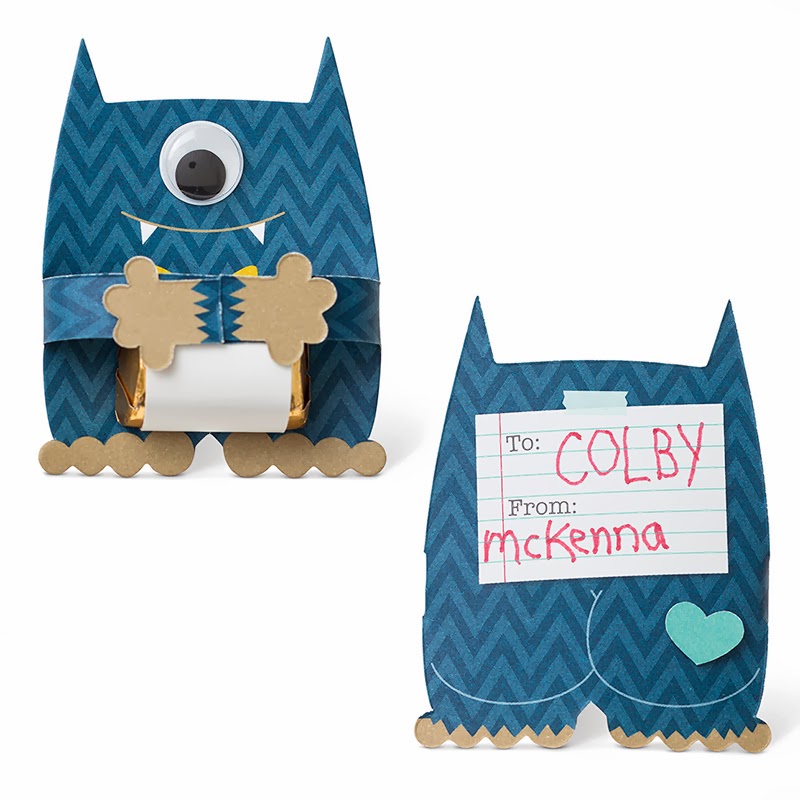
And then there are these cute little guys. Perfect for your kids to be able to give Valentine's to friends at school or church! 
Monster Hugs Boy (arms in front open out)
18 boy monsters, 18 googly eyes, 18 adhesive hearts
$9.95
#132162

Monster Hugs Girl (arms in front open out)
18 girl monsters, 18 googly eyes, 18 adhesive hearts
$9.95
#132163
I have ordered a few of these products for myself and am looking forward to designing some fun Valentine projects for our first Workshop of 2014!! (Woah, that was weird typing a 4 instead of a 3!)

Happy New Year!


Christy

Tuesday, December 17, 2013

DIY Minion Softies

Earlier in the year when the second Despicable Me movie was released, naturally my niece (4) and my nephew (6) fell in love with the characters all over again. I have a bit of a history of softie making for my nephew (and trust me alot of the toys are DODGY) but he loves all of them regardless of how they turned out. 

Not long after the movie was released it dawned on my nephew that I could make him a minion softie. He begged and begged, and knowing it would not be an easy task I kept putting him off and telling him I was too busy hoping he would forget, but of course, he did not. It didn't take long before my niece caught onto this and of course she wanted one too. So a few months ago I thought, what the heck, I'll make minions for Christmas. 

I scoured the internet for softie patterns because my history of toy patterns is far from polished. I came across this AWESOMELY great tutorial and based my creations off of it!

For the hair I found this neat wool at Lincraft that was all curly and knobbly looking. I threaded it through on the tops of their heads and knotted the strands into place. I think they look neat!


Mr 6's name starts with an S and Miss 4's name starts with a B so I wanted to make sure their minions were personalised so that there could be no arguments or confusion as to which minion belonged to who. So that is how the idea of the little logo got changed to the blue & pink letters on the overalls! At the end when I was adding the buttons it only seemed natural to match them to the letters and I love how they look!


And then it dawned on me there are different kinds of minions! So I was able to adjust the pattern and made the both the shorter two eyed minion and the taller one eyed minion (I have NO idea what their names are???). 


I decided to put in a lot of effort into making small, close stitches to make sure each element was ridiculously secure. I know the way  my niece and nephew play and careful and delicate is not their forte! It took me a long time to get all the elements completed but I think that gives the minions an overall more polished appearance which I'm pleased with.


The mouth's. That is always my least favourite part to tackle on any softie. More times than not they just look weird. I'm so pleased both mouth's turned out on these. It was one major "PHEW" from me!


And here are the finished products. Don't they look great? I know they will be happily received and loved on Christmas morning.

Have you made any Christmas presents this year? I'd love to hear about your creations.

Christy

Friday, December 13, 2013

Ruffle Tree Skirt

Look at my Christmas ruffle tree skirt!! I am so excited that I finished it!! It took me 4 days to complete from start to finish. I based the skirt off of this tutorial. 


I made my base slightly larger because I have a large Christmas tree. If I recall correctly I did it 50 inches in diameter. The only fabric I could find in my stash big enough to make the base all one piece of fabric was a soft pink fabric. At the time I thought it wouldn't matter cause you wouldn't see it. I was wrong.


The ruffles are so full and delicious that they stick up, revealing my ghastly pink mistake. I have decided to just get over it and deal with it. I thought I might tack down some of the bulkier ruffles to hide the pink but by the time I finished the skirt I just couldn't be bothered!! Maybe it will bother me another year and I'll do it? Maybe not... 


When I was sewing on the last row of ruffles hubby asked me if I'd checked that all the fabrics I had chosen matched the tree ornaments. I hadn't. And for a moment there I doubted my matching skills. But I had nothing to worry about. It matches perfectly with our colour scheme & my mismatched, eclectic style.


It feels wonderful to have ticked off one of my biggest Christmas craft projects EVER!! And I get to enjoy it for years and years to come! Now onto gift wrapping & my Christmas tree!


This year I went with super dooper simple gift wrapping. Who doesn't love brown paper? And hemp twine? And Kraft boxes? If you answered no to any of those questions, then you need to change your ways, because they are amazing!! The Kraft boxes are Stampin' Up! beauties. The larger boxes are found in the Seasonal Catalogue and they are $6.95 for a pack of 3 boxes (#132147) and the smaller boxes are found in the main catalogue and they are $4.95 for for a pack of 4 boxes (#124106). You can read more about the boxes here. I found an idea a few years ago to just use monogram tags to label Christmas gifts and this year I got around to doing it! Every member of my family has a different coloured letter to match in with the beautiful Christmas colours. I love how it has turned out. To make them I just punched out a 2-1/2" circle (#120906) out of Very Vanilla cardstock (#103550) and then cut out the letter I needed through the Big Shot (#113439) using the Typeset Alphabet Bigz Dies (#127553).
Now to finish the 4 other projects I have started and not yet finished..... In the meantime, here are some of my favourite tree ornaments!!


Merry Christmas!


Christy

Tuesday, December 10, 2013

Christmas Craft Inspiration!

I haven't had a great deal of time to do Christmas crafts but I'd love to share with you some of my favourite ideas this year. Some I am currently making, and other's I don't know that I will have time to make but definitely wish I did!! 


This beautiful string & felt flower wreath was found through Pinterest, but unfortunately the link did not work to find out the source of this image. I have made a start on this one but so far have only wrapped the string around my wreath... 


This tree skirt tutorial is AMAZING. (It can be found here). I am about half way through mine. I hope to do a blog post on it later in the week....


I'm loving these. SO FUN. I am half way through making these too! I have done 1 coat of spray paint but they need a few more coats. (Can be found here.)


This is one of the awesome projects I haven't gotten around to yet... A Christmas card holder wreath! Pretty neat huh? (Can be found here).


DIY baubles!! These are divine. Also on my "not yet done" list but maybe they'll happen? If not, next year definitely. The blog post I found these on (which can be found here), is filled with some pretty awesome ideas of how to use vintage paper in Christmas craft projects. Definitely worth checking out.


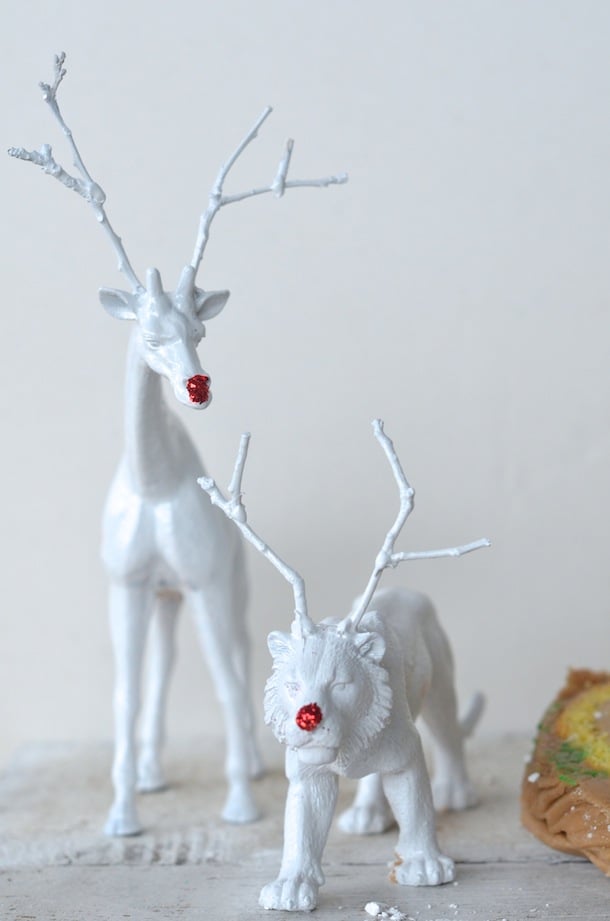
This one is a Martha Stewart special, thanks Martha. How CUTE huh? Just some cheap plastic deer toys, glue, and glitter! 


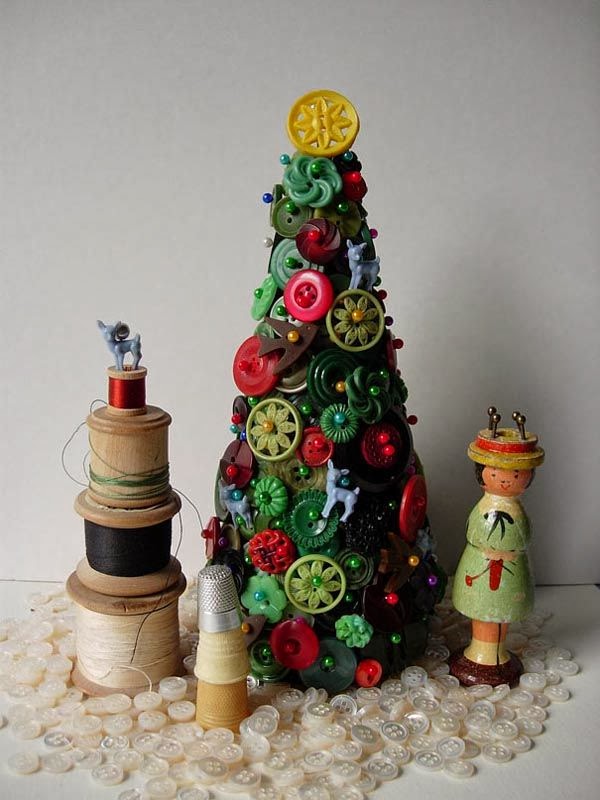
This too is not a project I've been able to set in motion but I just love it. (It can be found here). But I guess it goes without saying, there is buttons involved, therefore I love it!

What Christmas crafts have you been up to this year?  Feel free to share them over on my Facebook page.


Christy