Showing posts with label christmas. Show all posts

Friday, December 19, 2014

Signing off for another year


It has been QUITE the year!! A year full of making, creating, designing, paired with good times, tragedies around our nation and our world, time spent with family, friends, and time making new friends! It's also been a time of poor health for me, and finding a way to juggle the struggles I have and how to continue a normal life with the information I now have. 


 But one thing that has kept me sane, happy and raring to continue in life is ACP! I love to create and it is something that brings so much fun into my life. A creative life is a messy, beautiful and exciting life because it's full of new ideas, fresh products and I love working alongside my equally talented and visionary customers. 


I have BIG plans for 2015. There will be a WEBSITE! Gasp!! There is so much work involved in making this happen but I am SO EXCITED this is happening. It's been a long time in the planning, as in, me deciding what I wanted haha!! I think that is the hardest part! But it's happening, and I've been really busy creating beautiful new products that will be launched on my own little place on the internet. 


I am so so so so so grateful for all the support I've received over the past year. It's incredibly awesome being in the handmade community. You make friends with so many clever people. I am constantly in awe of how brilliant some people are in this world. It blows my mind almost daily the things people think of, and the skill, oh my the skills! It's such an honour to know these people and to draw inspiration from their commitment and experience. 


And last but not least, my customers. How awful my life would be without you! You make my world go round and I wouldn't and couldn't do this without you. Thank you for choosing ME. Thank you for trusting me with all your needs and desires. You're the BEST. 

Here's to 2015!! Woohoo!! xo


Christy

Tuesday, February 11, 2014

A Box of Cards for Christmas!


For the past two Christmases I have made my grand mother's a box of cards as their gift. They LOVE getting this as a gift as they are both the awesomely old fashioned type of grand mother's who like to send cards to friends and family for birthdays, thank you's and or to cheer someone up and let them know they are thinking of them.


Grand mother's are so difficult to buy a gift for aren't they? I would definitely put them in the same category as the men when it comes to gift shopping. They don't need anything, and what they might need is out of the budget, they can be a little fussy on what they like because they're set in their ways, and all that FUN stuff! 


So when I stumbled upon this idea two years ago for Christmas and gave them their boxes of cards for Christmas, and after hearing they were happy with the cards, I thought that this could become the gift I give them each year.


So this year I spent a day in December whipping up some beautiful, elegant card designs. I came up with 6 different designs, and made 2 of each design so there would be 12 cards all up for each grand mother. 


I would have liked to have made more for them, but I did run out of time a little! I had a nice mix of greetings including birthdays, thank you, thinking of you and a couple of blank cards to be used for whatever purpose necessary. 


I packaged them up with a co-ordinating envelope and they were placed inside a cupcake kit box which is covered in brown wrapping paper! You wouldn't know it would you? A little bit of recycling fun :)


I got the exact same reaction and comments from each grand mother when they opened their gifts as I saw them on different days around Christmas. Here is what I heard:

"Oh is this another box of cards?"

"Perfect timing, I just sent my last card to a friend last week"

"These are my special cards and I only give them to special people"

"Whenever I give out one of these cards I always tell them that my grand daughter Christy made this card"

And just for fun, one of my grand mother's jumped up in excitement when she opened the gift. I was laughing so hard I almost cried.

If you would like to order a box of cards for your "hard-to-buy-for" grand mother, let me know! 

Christy

Wednesday, January 22, 2014

My Cream & Gold Christmas Table Setting


I just LOVE neutral table settings. There is something magical about it so it was easy for me to settle on Cream & Gold (with other neutral tones thrown in) for the big family Christmas lunch (which we had on Boxing Day). 


For the most part I was able to throw this table setting together using what I had at home. The only things I needed to buy were the gold & cream bon bons (which were a headache to find) and the chocolate & white striped straws which I purchased from Lille Parti for a couple of dollars (which you can see a couple of photos down). 


I knew that I was going to have a busy display running down the centre of the table, so I chose to not make place setting cards. Instead I opted for these simple name tags to tie around the cutlery. I love the way it brings a rustic feel to the place setting. 


For drinks we each had a wine glass jazzed up with a twine bow, and a glass bottle for water, decorated with a sweet mini paper doily, a brown cardstock circle, white & gold baker's twine and a mini punchie with "merry" on it. Majorly cute and everyone commented on how lovely the bottles looked. It is such a easy and cheap way to dress up a boring bottle instead of using a regular water glass.


For my table decorations, I simply ran a roll of burlap down the centre over the top of my calico tablecloth. Then I placed my trusty mini logs & spray painted pine cones all over which I had made for my Thanksgiving lunch which you can recap on over here. I just collected whatever I could find around the house that was neutral toned and whacked it on the table too! It really was nothing fancy! 


Here is one of my reindeer animals! I made a whole bunch of these and showed them on my FB page, you can see all of them over here. (I also blogged about them when I first found the idea here). They were a fun talking point over lunch! 


The last little detail on the main dining table was my big paper doily under the dinner plates! This idea came to me as I was pulling out the mini doilies for the glass bottles. I saw my packet of large ones there and the idea truck! I love how it looks! Love me some doilies! 

Now onto the glorious FOOD!! 


I made up some matching food signs for over on the food table. I know how much I like it when I know what food I am piling onto my plate so I am loving using food signs at all events these days. They are super easy and cheap to make. I just used cardstock, chocolate & white baker's twine, I punched out some ornaments out of my glimmery gold cardstock and threw on a large pearl to glam it up a little. 

The foods we enjoyed for lunch were Rice Salad, Mango Avocado Salad, Ambrosia Salad, Turkey, Ham, Garlic Prawns & Cranberry Sauce.


This was my layout for the food table. I set it up on mums buffet in the dining room right near the table. I threw on a lovely vintage cream lacey tablecloth, a burlap runner and a couple of decorations. The white stands are candle holders from Ikea. They come in handy ALOT. 

And here is all the glorious food! We sure did enjoy it! Can't wait until next year so we can eat it all again!


 And the moral of the story is, if you need food signs, place settings, bottle decorating or any other papercrafting related goods to style your party, we are ready to help you! We can customise everything to suit your needs, your colour scheme, your theme and your tastes all for a reasonable price! Please don't hesitate to contact me if you have any questions!


Christy

Wednesday, January 15, 2014

Christmas Day (throw together) Lunch Table


I know I'm late with my Christmas posts but here they are. As ridiculous as it sounds because it feels like Christmas was month's ago, this post is actually only 2 and a bit weeks late. So it's not THAT bad. 


Christmas last year was a little different from normal. We had a really quiet Christmas Day at Mum & Dad's with a few extra friends over for lunch. I hadn't thought of making a nice table setting for lunch and was making salads in the kitchen when I saw the dismal Christmas table setting being put together by my Mum (she's not known for her decorating skills). I quickly finished up in the kitchen and threw together a few things on the table to dress it up a little and to try and make her ghastly green tablecloth look like it was meant to be there (I love green and even I don't like that thing). 


Doesn't a little bit of string tied in a bow around a wine glass (or is it a champers glass? I have no idea...) look so elegant? It's my new favourite decorating thing to do. Now all those bits and pieces were NOT from my parent's house. Oh no. I brought over 8 boxes of MY bits and pieces from my house over to hers for decorating purposes. There was a main reason I brought it all over but you will have to wait a few more days before I show you that one! :) 


For lunch we enjoyed Mango Macadamia Salad, Garlic Chilli Prawn Skewers, freshly cut ham off the bone, chicken thighs (for people like ME who hate seafood) and Coleslaw. Nice, simple, tasty, fresh & light! 


Man I could do with a slice of that ham right about now. Nom nom nom!! 

My BIG Christmas table project will be revealed later in the week. You better be ready for it, it's fairly AMAZING. 

Christy

Tuesday, December 17, 2013

DIY Minion Softies

Earlier in the year when the second Despicable Me movie was released, naturally my niece (4) and my nephew (6) fell in love with the characters all over again. I have a bit of a history of softie making for my nephew (and trust me alot of the toys are DODGY) but he loves all of them regardless of how they turned out. 

Not long after the movie was released it dawned on my nephew that I could make him a minion softie. He begged and begged, and knowing it would not be an easy task I kept putting him off and telling him I was too busy hoping he would forget, but of course, he did not. It didn't take long before my niece caught onto this and of course she wanted one too. So a few months ago I thought, what the heck, I'll make minions for Christmas. 

I scoured the internet for softie patterns because my history of toy patterns is far from polished. I came across this AWESOMELY great tutorial and based my creations off of it!

For the hair I found this neat wool at Lincraft that was all curly and knobbly looking. I threaded it through on the tops of their heads and knotted the strands into place. I think they look neat!


Mr 6's name starts with an S and Miss 4's name starts with a B so I wanted to make sure their minions were personalised so that there could be no arguments or confusion as to which minion belonged to who. So that is how the idea of the little logo got changed to the blue & pink letters on the overalls! At the end when I was adding the buttons it only seemed natural to match them to the letters and I love how they look!


And then it dawned on me there are different kinds of minions! So I was able to adjust the pattern and made the both the shorter two eyed minion and the taller one eyed minion (I have NO idea what their names are???). 


I decided to put in a lot of effort into making small, close stitches to make sure each element was ridiculously secure. I know the way  my niece and nephew play and careful and delicate is not their forte! It took me a long time to get all the elements completed but I think that gives the minions an overall more polished appearance which I'm pleased with.


The mouth's. That is always my least favourite part to tackle on any softie. More times than not they just look weird. I'm so pleased both mouth's turned out on these. It was one major "PHEW" from me!


And here are the finished products. Don't they look great? I know they will be happily received and loved on Christmas morning.

Have you made any Christmas presents this year? I'd love to hear about your creations.

Christy

Friday, December 13, 2013

Ruffle Tree Skirt

Look at my Christmas ruffle tree skirt!! I am so excited that I finished it!! It took me 4 days to complete from start to finish. I based the skirt off of this tutorial


I made my base slightly larger because I have a large Christmas tree. If I recall correctly I did it 50 inches in diameter. The only fabric I could find in my stash big enough to make the base all one piece of fabric was a soft pink fabric. At the time I thought it wouldn't matter cause you wouldn't see it. I was wrong.


The ruffles are so full and delicious that they stick up, revealing my ghastly pink mistake. I have decided to just get over it and deal with it. I thought I might tack down some of the bulkier ruffles to hide the pink but by the time I finished the skirt I just couldn't be bothered!! Maybe it will bother me another year and I'll do it? Maybe not... 


When I was sewing on the last row of ruffles hubby asked me if I'd checked that all the fabrics I had chosen matched the tree ornaments. I hadn't. And for a moment there I doubted my matching skills. But I had nothing to worry about. It matches perfectly with our colour scheme & my mismatched, eclectic style.


It feels wonderful to have ticked off one of my biggest Christmas craft projects EVER!! And I get to enjoy it for years and years to come! Now onto gift wrapping & my Christmas tree!


This year I went with super dooper simple gift wrapping. Who doesn't love brown paper? And hemp twine? And Kraft boxes? If you answered no to any of those questions, then you need to change your ways, because they are amazing!! The Kraft boxes are Stampin' Up! beauties. The larger boxes are found in the Seasonal Catalogue and they are $6.95 for a pack of 3 boxes (#132147) and the smaller boxes are found in the main catalogue and they are $4.95 for for a pack of 4 boxes (#124106). You can read more about the boxes here. I found an idea a few years ago to just use monogram tags to label Christmas gifts and this year I got around to doing it! Every member of my family has a different coloured letter to match in with the beautiful Christmas colours. I love how it has turned out. To make them I just punched out a 2-1/2" circle (#120906) out of Very Vanilla cardstock (#103550) and then cut out the letter I needed through the Big Shot (#113439) using the Typeset Alphabet Bigz Dies (#127553).

Now to finish the 4 other projects I have started and not yet finished..... In the meantime, here are some of my favourite tree ornaments!!


Merry Christmas!


Christy

Tuesday, December 10, 2013

Christmas Craft Inspiration!

I haven't had a great deal of time to do Christmas crafts but I'd love to share with you some of my favourite ideas this year. Some I am currently making, and other's I don't know that I will have time to make but definitely wish I did!! 


This beautiful string & felt flower wreath was found through Pinterest, but unfortunately the link did not work to find out the source of this image. I have made a start on this one but so far have only wrapped the string around my wreath... 


This tree skirt tutorial is AMAZING. (It can be found here). I am about half way through mine. I hope to do a blog post on it later in the week....


I'm loving these. SO FUN. I am half way through making these too! I have done 1 coat of spray paint but they need a few more coats. (Can be found here.)


This is one of the awesome projects I haven't gotten around to yet... A Christmas card holder wreath! Pretty neat huh? (Can be found here).


DIY baubles!! These are divine. Also on my "not yet done" list but maybe they'll happen? If not, next year definitely. The blog post I found these on (which can be found here), is filled with some pretty awesome ideas of how to use vintage paper in Christmas craft projects. Definitely worth checking out.


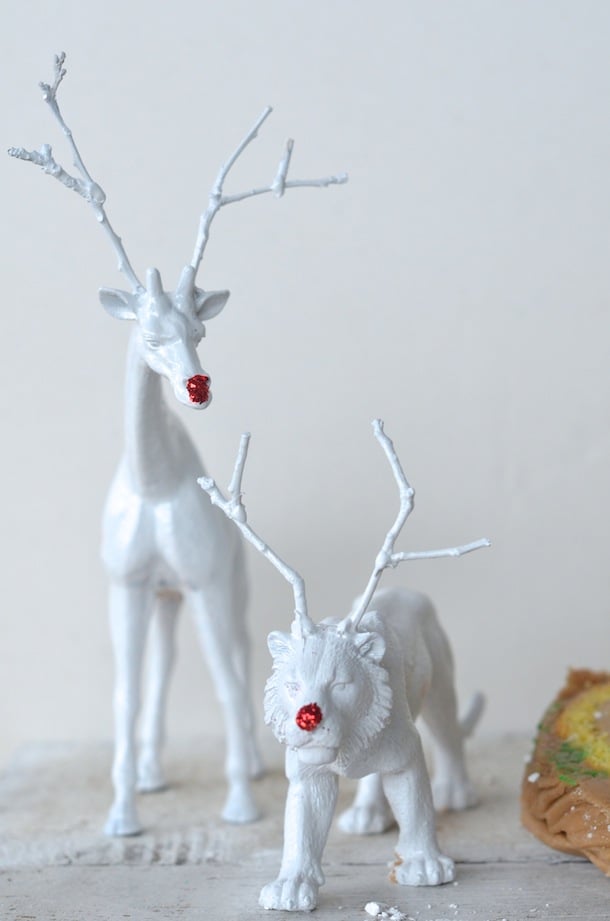
This one is a Martha Stewart special, thanks Martha. How CUTE huh? Just some cheap plastic deer toys, glue, and glitter! 


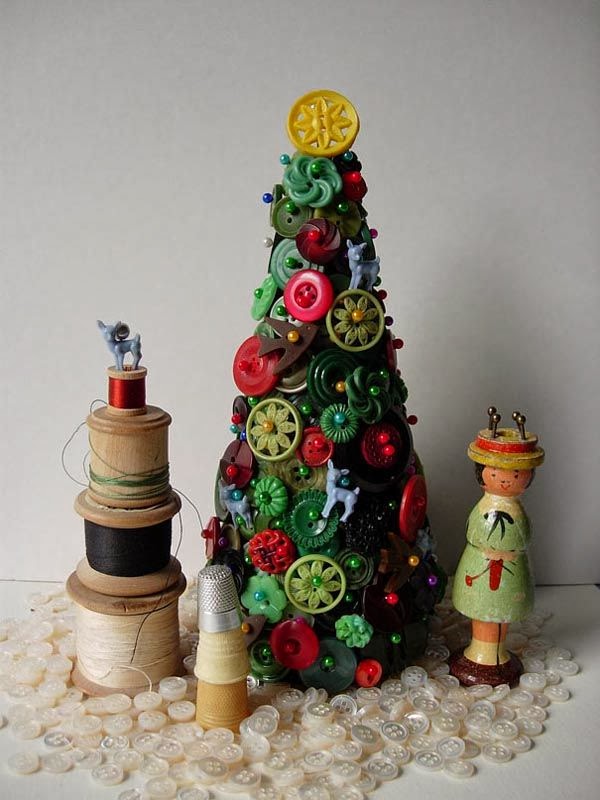
This too is not a project I've been able to set in motion but I just love it. (It can be found here). But I guess it goes without saying, there is buttons involved, therefore I love it!

What Christmas crafts have you been up to this year?  Feel free to share them over on my Facebook page.


Christy